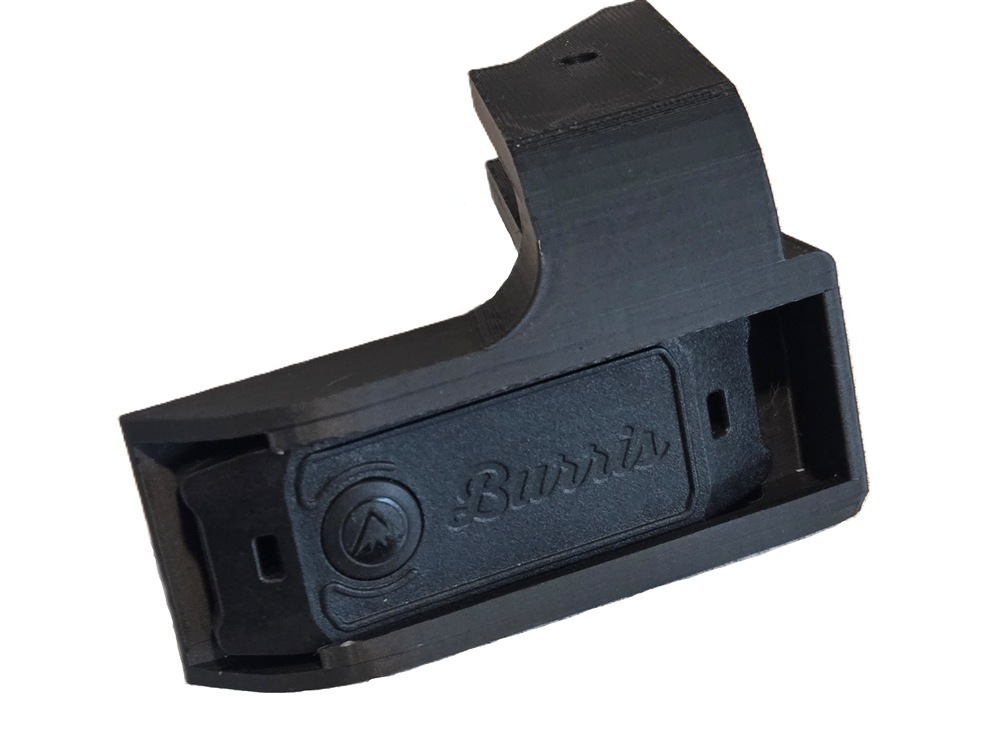
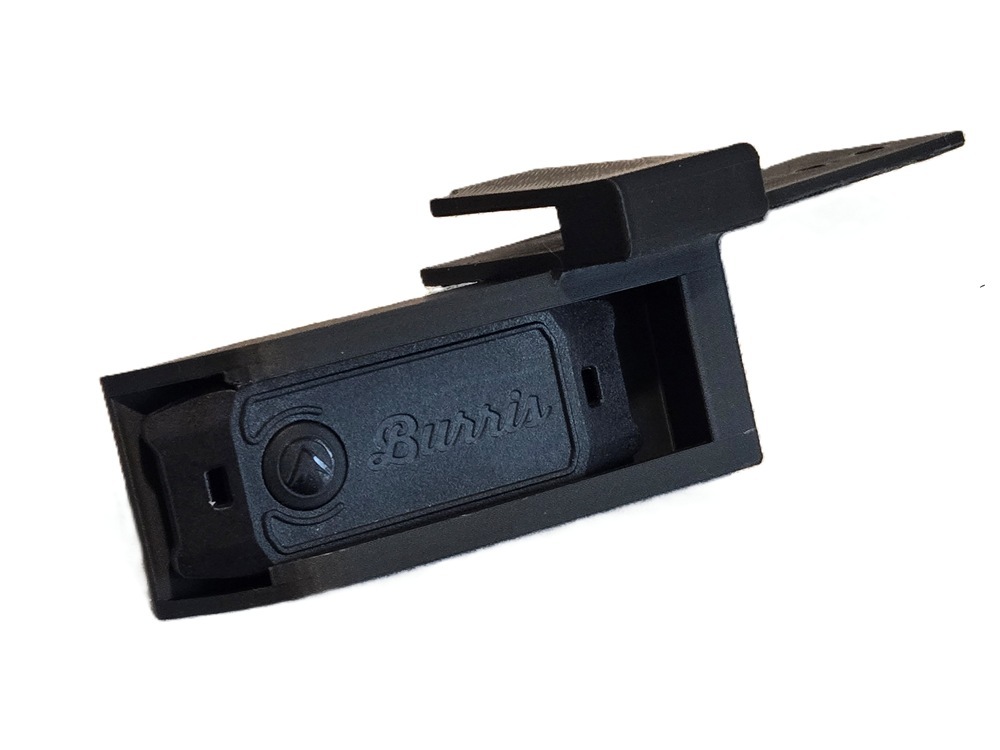
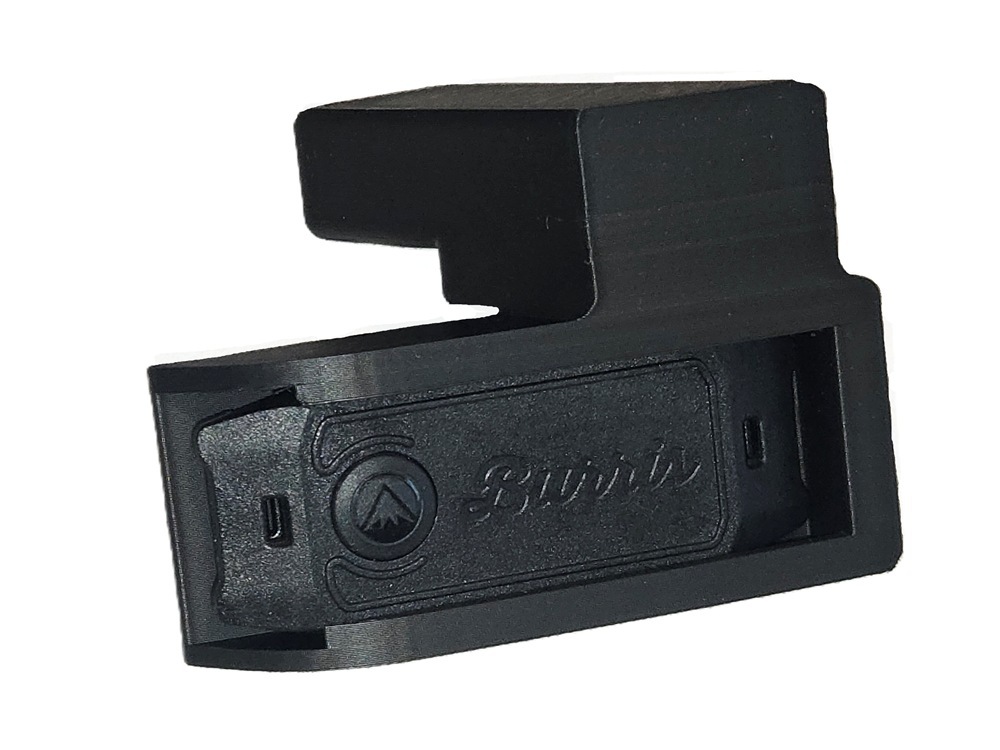
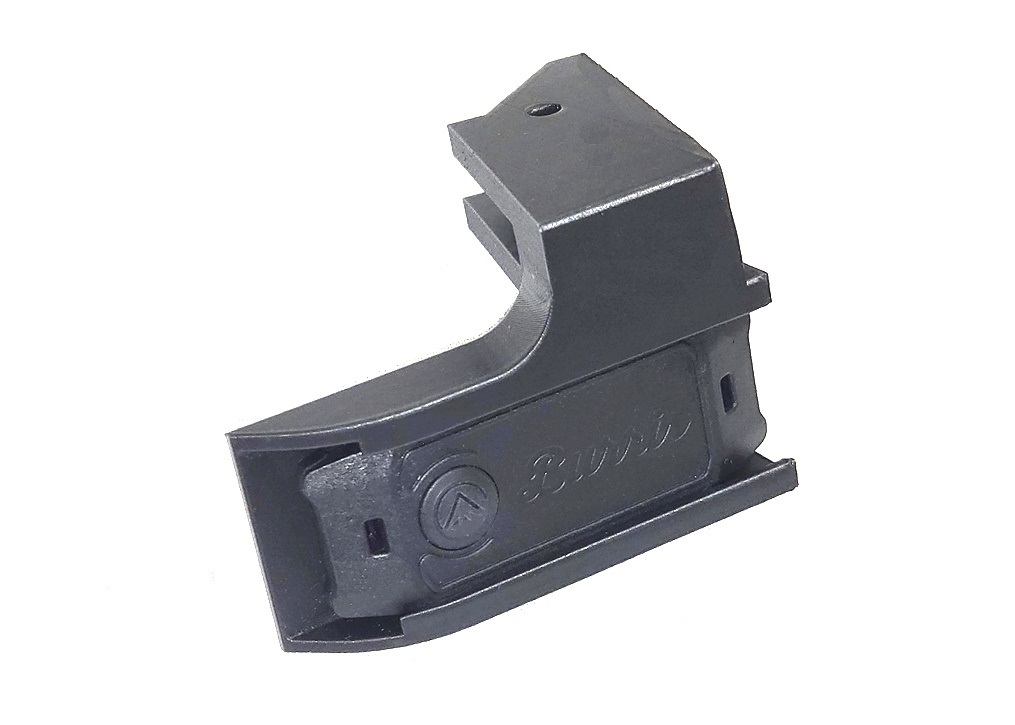
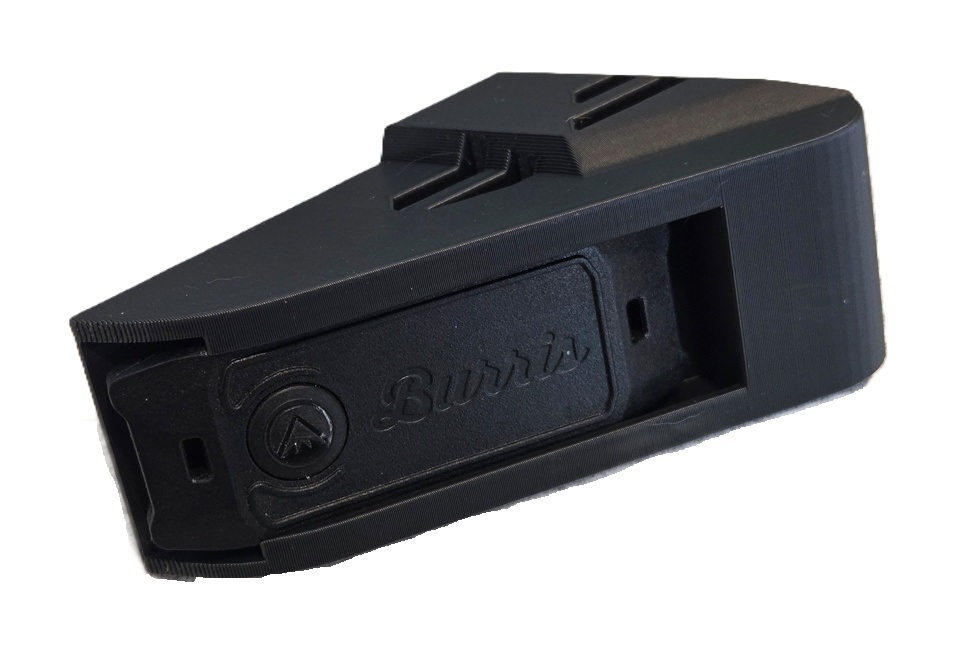
Burris Oracle X and CERTIS Remote Mounting Instructions
TenPoint Crossbows
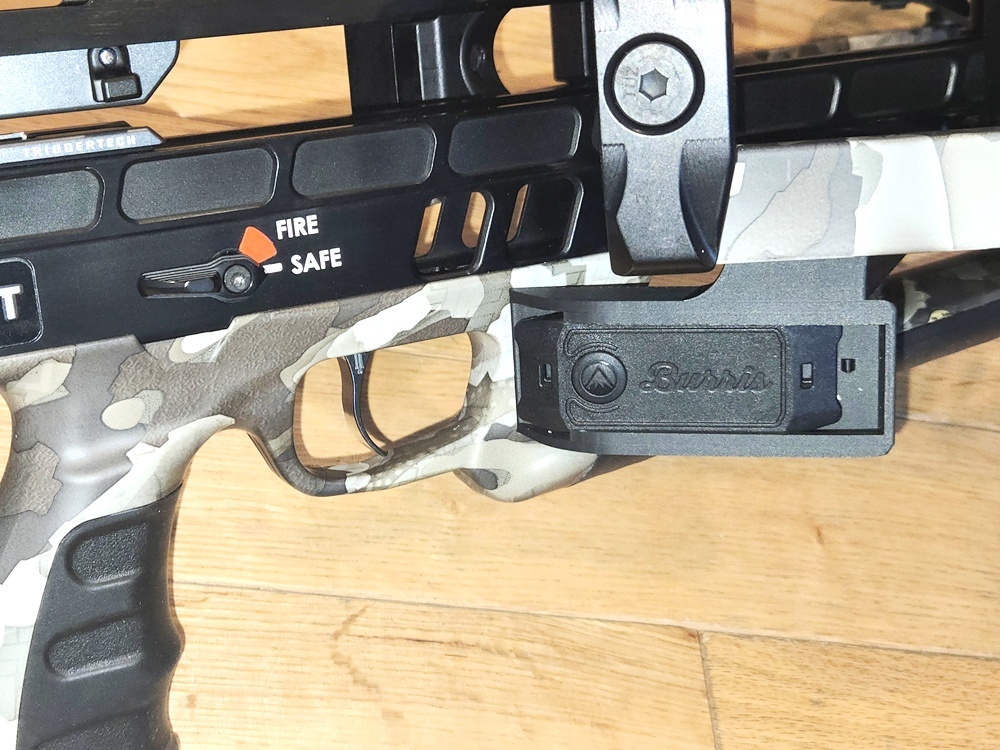
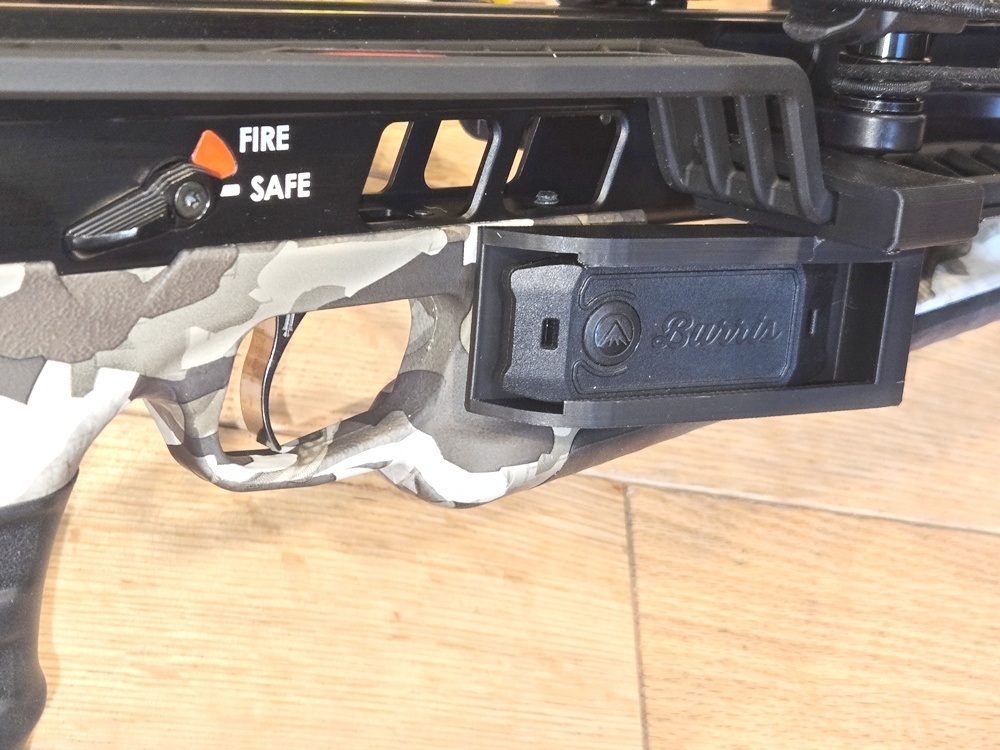
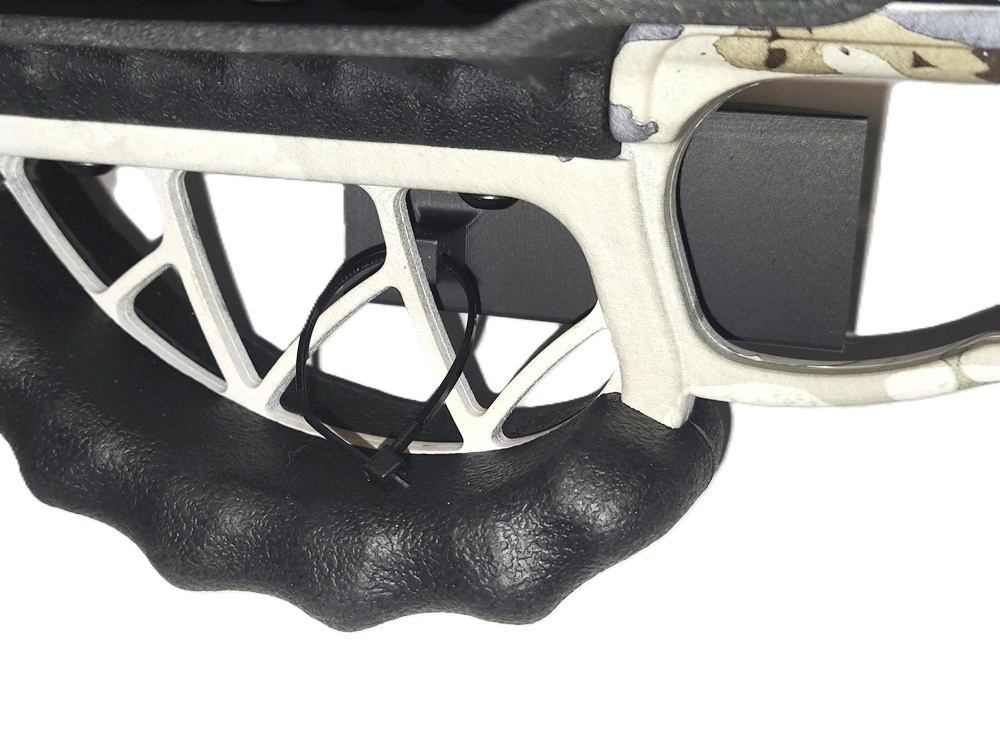
TenPoint Model TX440, TX29, TRX26, TRX ULTRA
A) Slide remote into the holder, with the button towards the open end, until it snaps into place. It should be a very tight fit.
B) Slide the supports all the way onto the finger guard, making sure it is fully seated on the guard. You can move it forward or back to find a comfortable angle.
C) Secure the holder to the finger guard by running the included zip tie thru the hole in center of the holder.
 |
 |
|
TenPoint Model TX ULTRA 26.5
A) Slide remote into the holder, with the button towards the open end, until it snaps into place. It should be a very tight fit.
B) Slide the supports all the way onto the finger guard, making sure it is fully seated on the guard.
C) Secure the holder to the finger guard by running the included zip tie thru the hole in center of the holder.
 |
 |
|
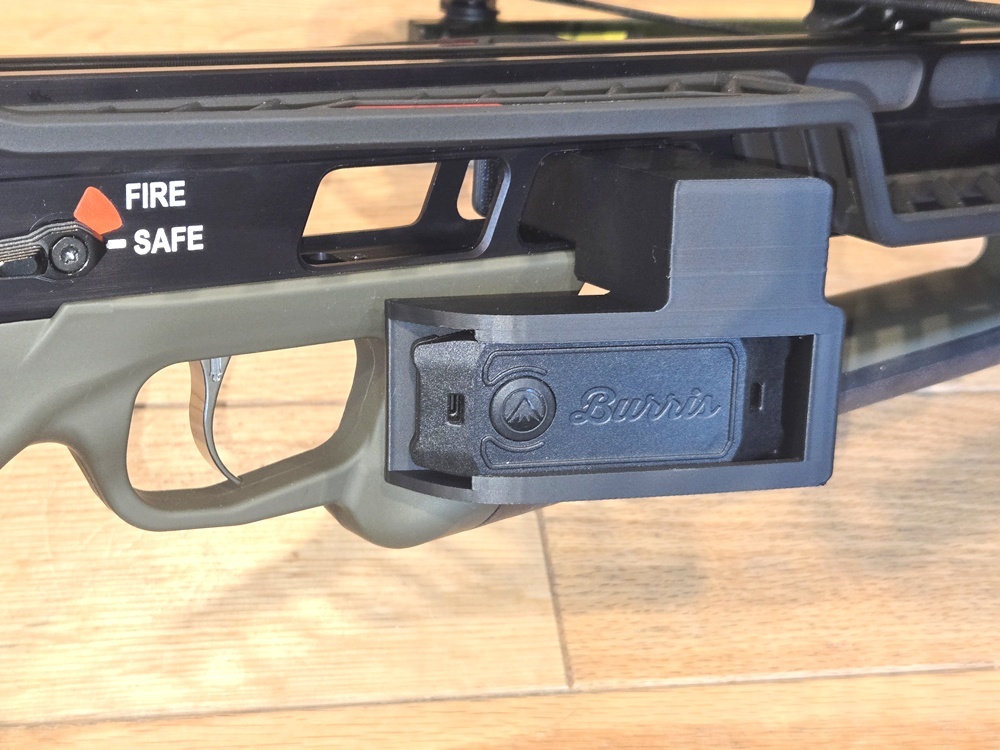
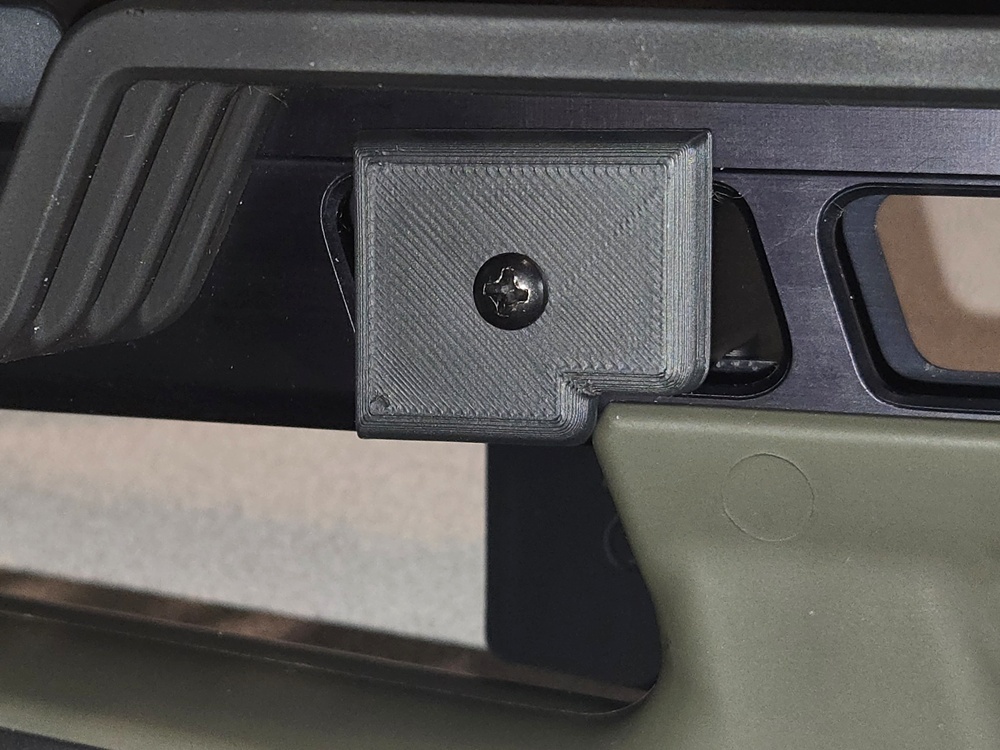
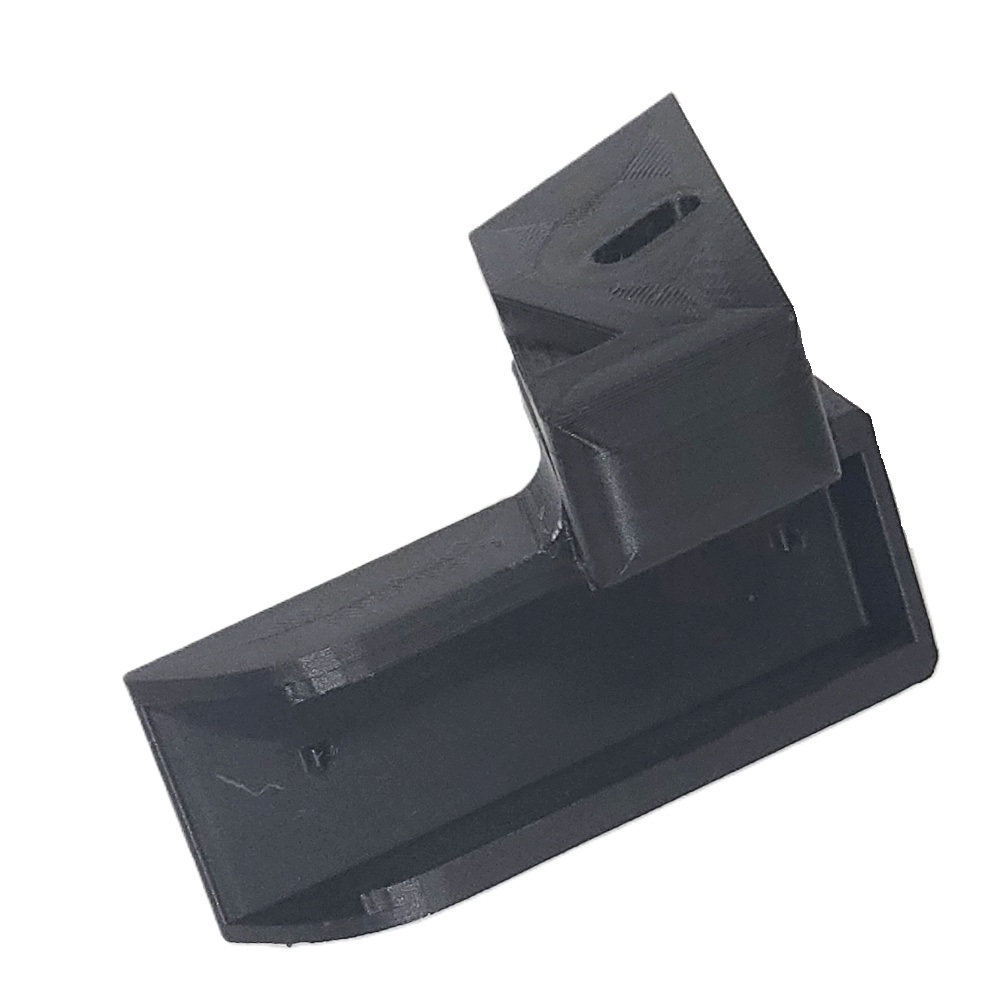
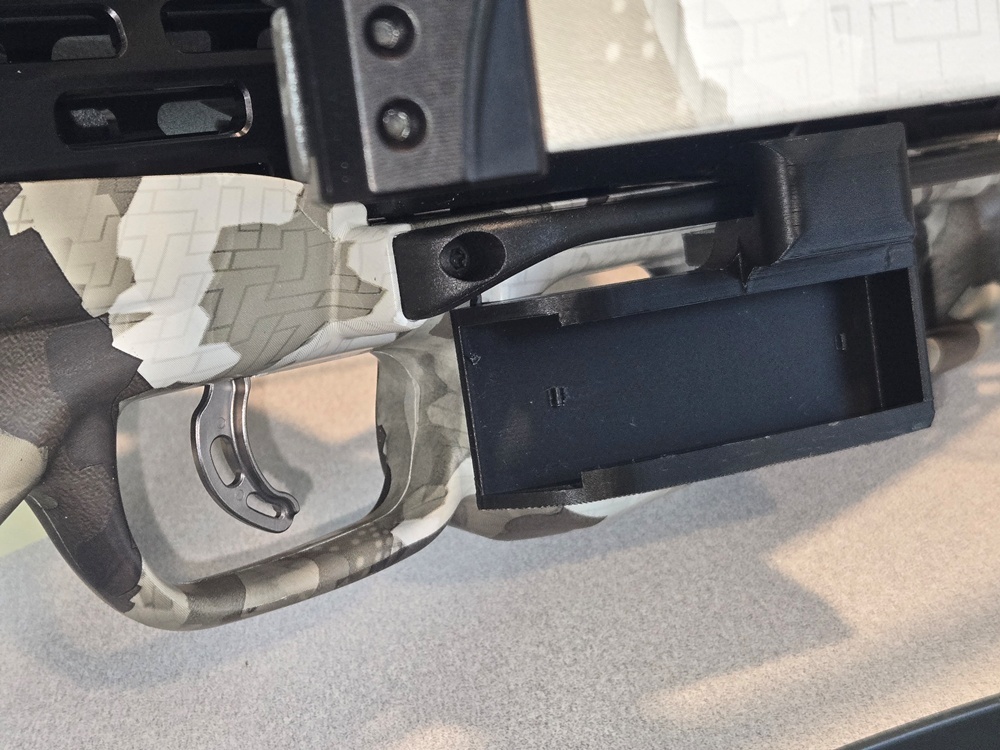
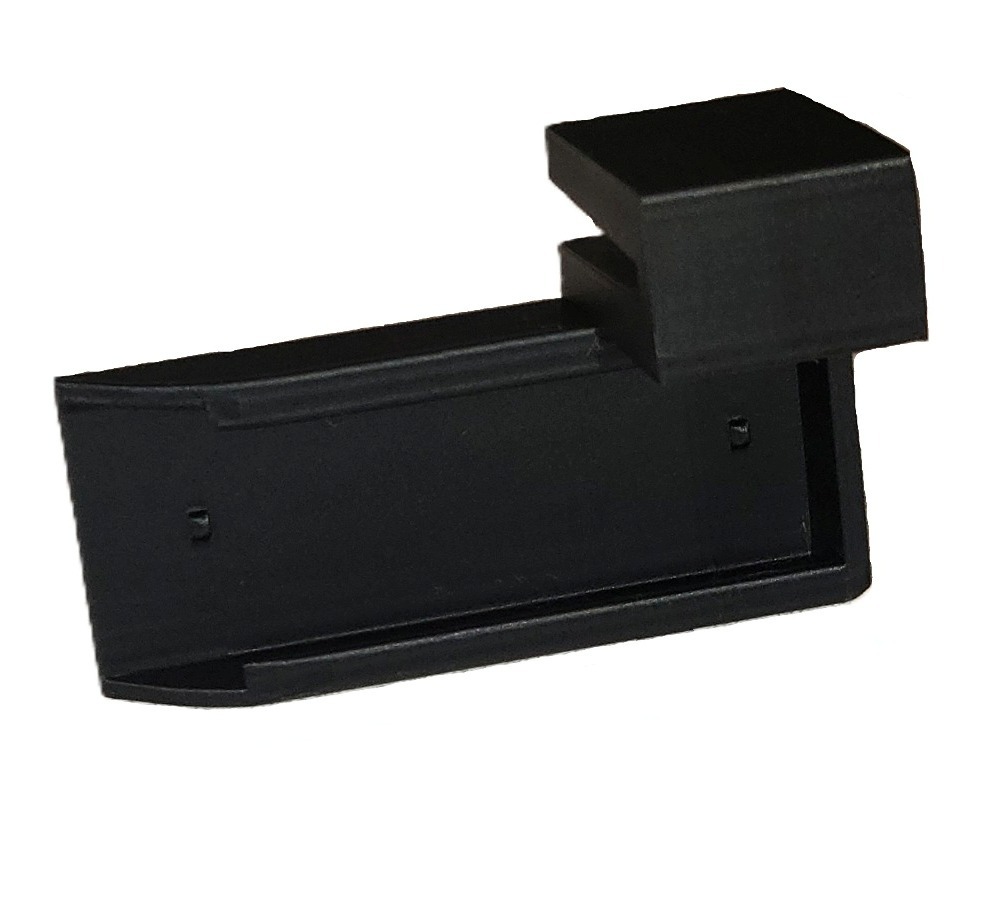
TenPoint Model TX ULTRA 29.5
A) Slide remote into the holder, with the button towards the open end, until it snaps into place. It should be a very tight fit.
B) Slide the supports all the way thru the front hole on the rail just above the grip. Making sure it is fully seated against the rail.
C) Secure the bracket by placing the plate on the other side, making sure to align the notch in the plate, with the included screw.
DO NOT OVERTIGHTEN THE SCREW OR IT COULD PUL THE INSERT OUT.
 |
 |
 |
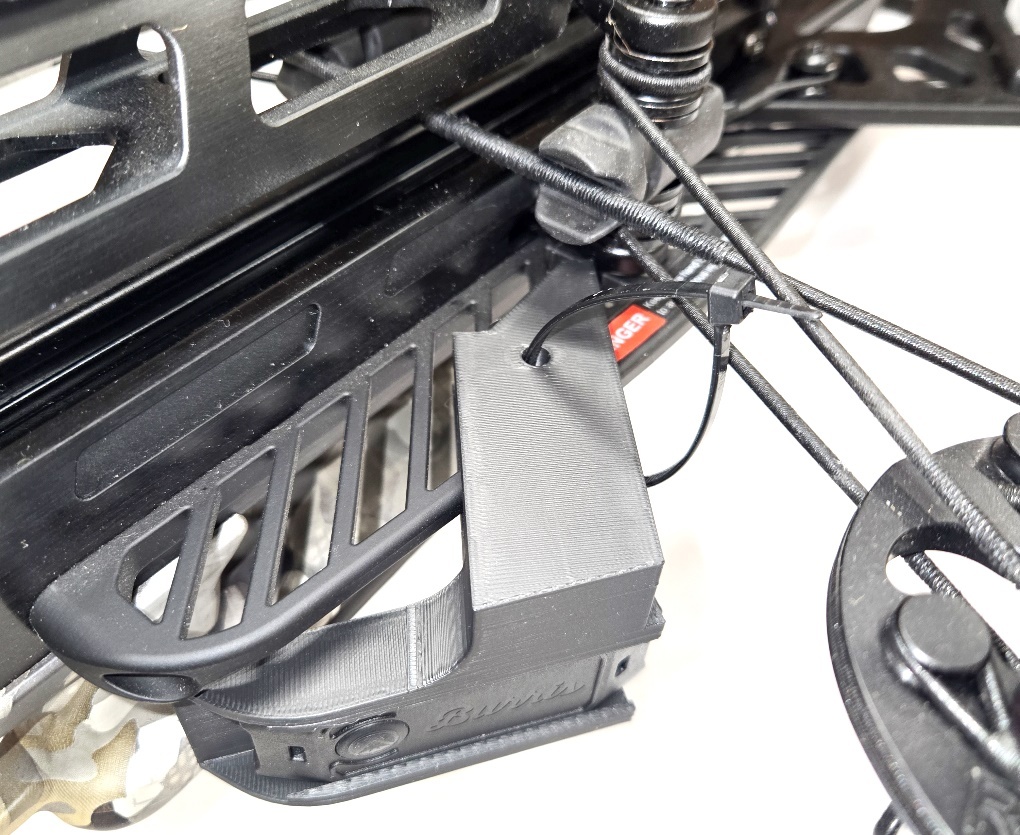
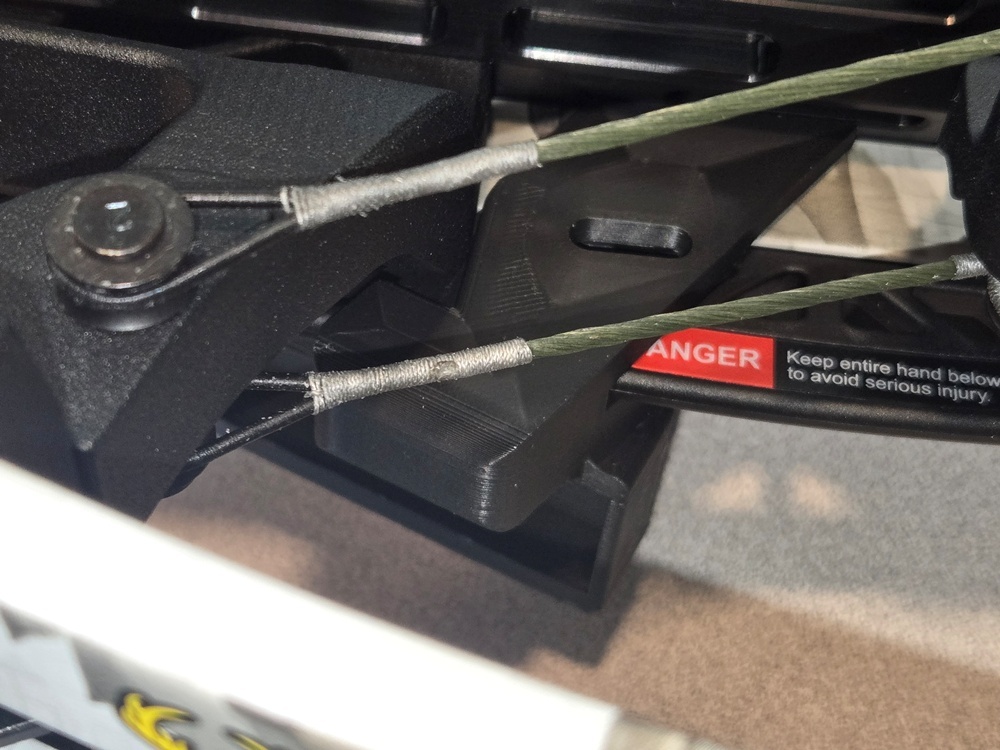
TenPoint Model Venom X, Turbo X, Stealth 450R
A) Slide remote into the holder, with the button towards the open end, until it snaps into place. It should be a very tight fit.
B) Slide the supports all the way onto the finger guard, making sure it is fully seated on the guard. Slide it foward or back until it is comfortable.
C) Secure the holder to the finger guard by running the included zip tie thru the hole in center of the holder.
|
|
TenPoint Model FlatLine and Siege
A) Slide remote into the holder, with the button towards the open end, until it snaps into place. It should be a very tight fit.
B) Slide the supports all the way onto the finger guard, making sure it is fully seated on the guard.
C) Secure the holder to the finger guard by running the included zip tie thru the hole in center of the holder.
 |
 |
 |
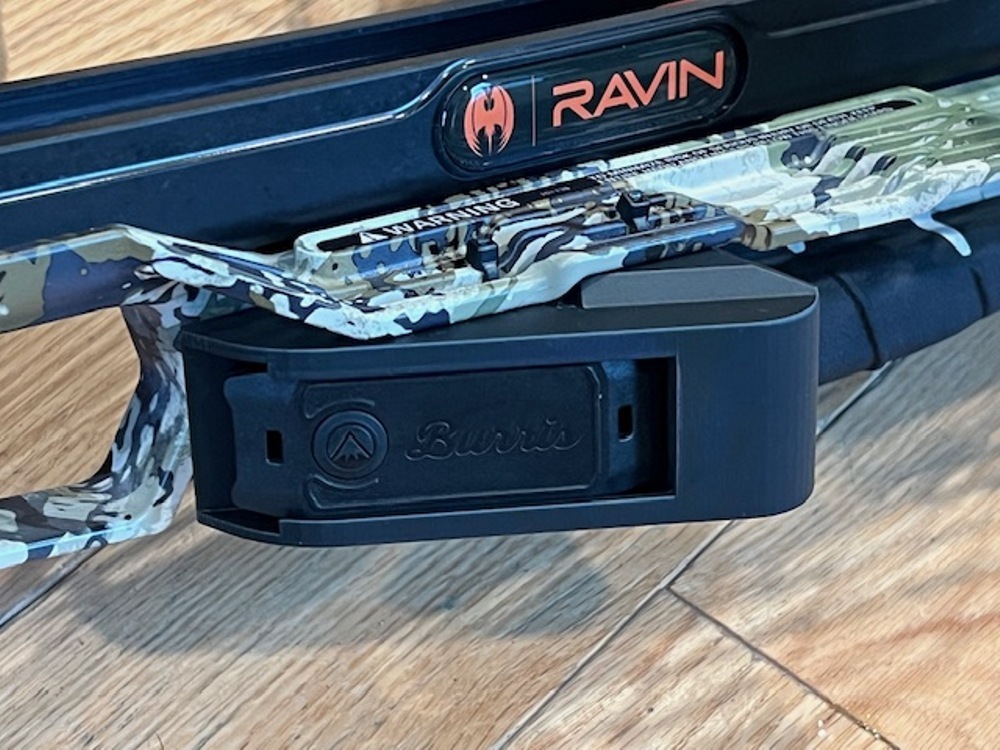
Ravin Crossbows
Ravin Model R8, R10, R10 PRO or R20
A) Slide remote into the holder, with the button towards the open end, until it snaps into place. It should be a very tight fit.
B) Slide the supports all the way onto the finger guard, making sure it is fully seated on the guard. You can move it forward or back to find a comfortable angle.
C) Secure the holder to the finger guard by running the included zip tie thru the hole in center of the holder.
 |
|
|
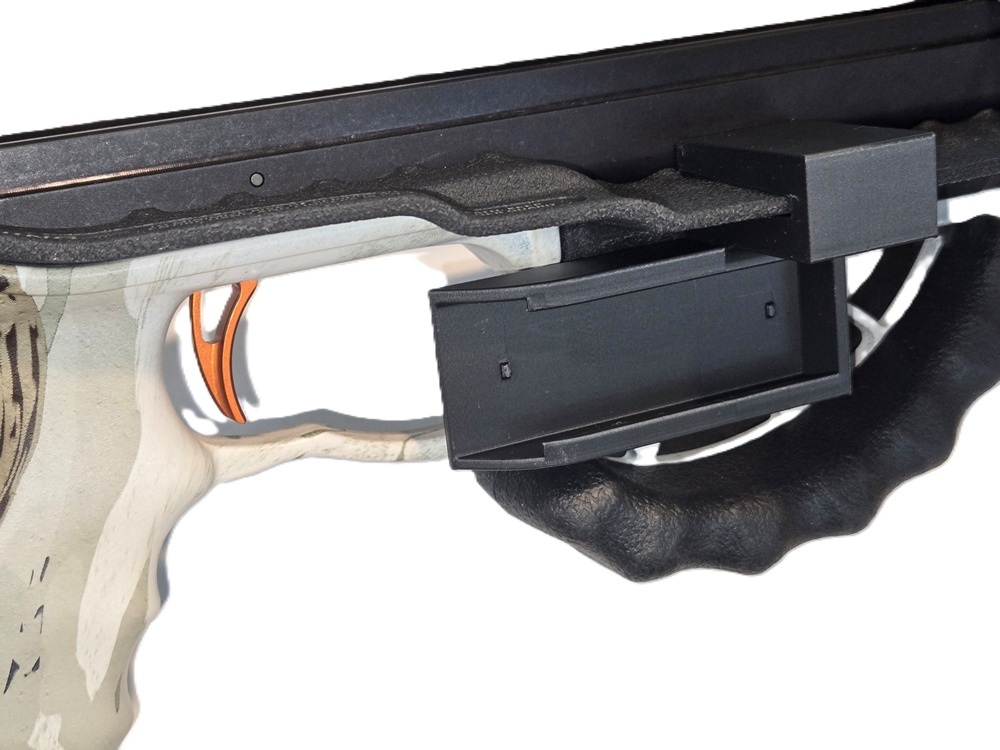
Ravin Model R10X, R10X Pro, or LR
A) Slide remote into the holder, with the button towards the open end, until it snaps into place. It should be a very tight fit.
B) Place the bracket on the bottom of the finger guard with the raised part of the bracket against the first raised part of the finger guard.
C) Secure the holder to the finger guard by running the included zip ties thru the two holes in center of the holder.
 |
 |
|
Ravin Model R26X or R29X
A) Slide remote into the holder, with the button towards the open end, until it snaps into place. It should be a very tight fit.
B) Slide the supports all the way onto the finger guard, making sure it is fully seated on the guard. There is a slot in the bracket that aligns with the notch on the finger guard.
C) Secure the holder to the finger guard supports by running the included zip tie thru the hole in the bracket.
 |
 |
 |